
Prices and ratings were checked on Amazon on October 10, 2026. Thresholds follow EPA and CDC guidance. Home monitors are good for trends and for finding problems, not for lab-grade proof.
Air quality testing is not a luxury. It is the quickest way to find out whether the stuffy bedroom is a ventilation problem, whether the basement is a radon problem or whether the cough that gets worse at home has a cause you can fix. Guessing is expensive. A cheap test is not.
The good news: you do not need to hire anyone for most of it. A simple three-step plan gets you most of the answers for a small cost. Start with the risk you cannot sense, then watch the everyday numbers, then bring in help only when something looks off.
Table of Contents
Air Quality Testing Methods and Costs
| Testing method | Typical cost | What it measures | How long it takes |
|---|---|---|---|
| Home air quality monitor | $30 to $330 | PM2.5, CO2, humidity, VOC score (varies by model) | Live, all the time |
| Radon test kit or digital detector | About $15 to $150 | Radon gas only | 2 to 7 days for a short test; 90 days or more for a long one |
| Mold or allergen sampling kit | Low cost | Whether spores are present; says little about risk | Days to weeks with a lab |
| Professional inspection | Several hundred dollars | Moisture, hidden mold sources, ventilation, specific gases | A visit plus a report |
What to Test First
You cannot test everything, and you do not need to. These six matter most, in this order.
- Radon. A colorless, odorless gas from soil, and a leading cause of lung cancer in non-smokers. The EPA says to fix a home at 4 pCi/L or higher, and to consider it between 2 and 4. There is no known safe level. Read our guide on what radon is and how to test for it.
- PM2.5. Tiny particles from cooking, candles, smoke and traffic that reach deep into the lungs. The EPA’s 24-hour limit is 35 micrograms per cubic meter, and its yearly average limit is lower, at 9. Indoors, a spike after cooking is normal. A flat high line is not.
- CO2. Not a poison at home levels, but a handy stand-in for stale air. Outdoor air is around 420 ppm. A reading above 1,000 ppm in a bedroom usually means the room needs fresh air.
- Humidity. The EPA suggests 30 to 50 percent indoors. Higher feeds mold and dust mites; lower dries out noses and throats.
- Carbon monoxide. A monitor is not the tool. Install UL-listed CO alarms near sleeping areas instead.
- VOCs and formaldehyde. Most home monitors give a VOC score, not a measured chemical. Treat it as a hint that something is off, such as new furniture, paint or cleaning products.
Skip routine mold testing. The EPA does not recommend sampling when mold is visible or smells, since you need to find and fix the water source either way.
Looking ahead, home air sensors are getting cheaper and easier to read. Radon monitors that talk to your phone, CO2 meters with a tiny screen and all-in-one boxes are becoming normal, and more homes will have one on a shelf. The catch is that low-cost sensors drift, so a reading can slip over the months if the device is never checked.
Monitors and Detectors That Are Worth a Look
These four cover the main jobs. Prices and ratings were checked on Amazon on October 10, 2026.
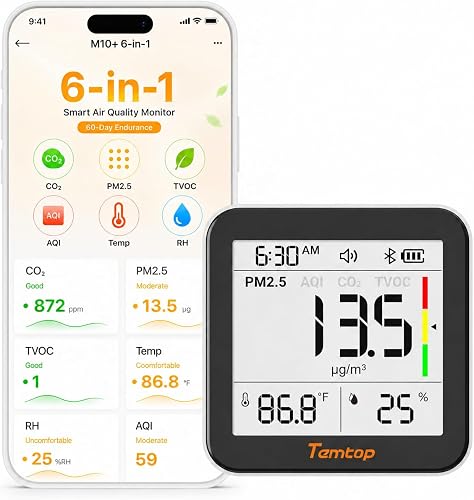
Price on Amazon: $95.00 | 4.2 stars from 154 ratings (checked October 10, 2026)
The Temtop M10+ is a low-cost, all-in-one box with a screen and an app. It is a good first monitor for a bedroom or home office. As with all low-cost laser sensors, readings are best for trends, not exact numbers.
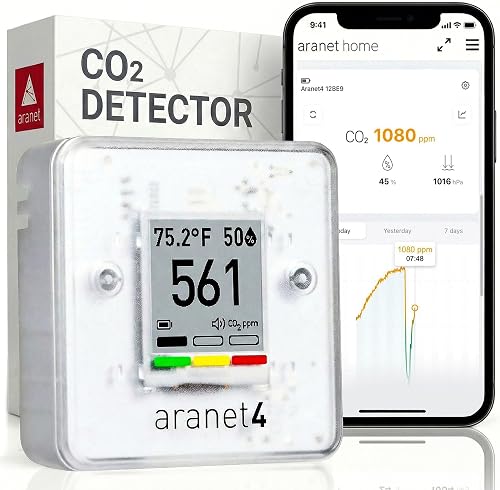
Price on Amazon: $189.00 | 4.7 stars from 1,877 ratings (checked October 10, 2026)
The Aranet4 does one job well: CO2. The listing says it uses an NDIR sensor, the type used in better CO2 meters, and the battery is rated for four years. It is a good fit for a bedroom or a classroom-style room.
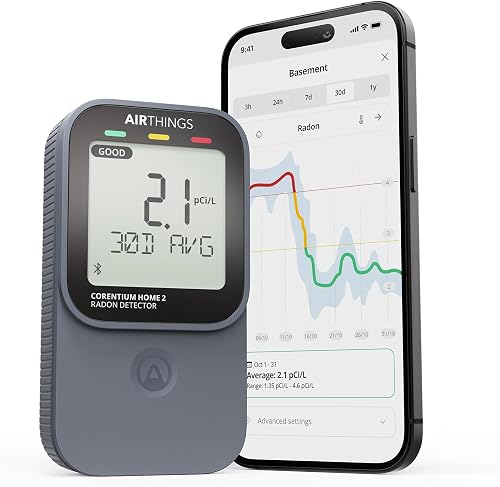
Price on Amazon: $149.99 | 4.4 stars from 451 ratings (checked October 10, 2026)
The Airthings Corentium Home 2 is a digital radon detector with Bluetooth. A digital unit shows a short-term and a long-term average, so you can see what your basement does over weeks. See our Pro-Lab radon kit review if you prefer a mail-in lab test.
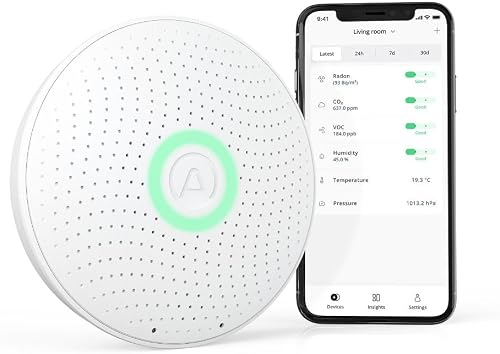
Price on Amazon: $249.99 | 4.2 stars from 3,236 ratings (checked October 10, 2026)
The Airthings Wave Plus adds radon to CO2, VOC and humidity in one battery-powered device. It costs more, but it replaces two gadgets. Our full ranking of indoor air quality monitors compares more options.
How to Test Your Home Step by Step
- Test radon first. Place the kit in the lowest lived-in level, away from drafts, doors and fans. Keep windows closed during a short test. Mail it to the lab, or read the digital average.
- Put the monitor in the bedroom. Keep it at breathing height, away from windows, vents and the kitchen. Leave it for two weeks to get a baseline.
- Run a few experiments. Watch what happens when you cook, close the bedroom door overnight, open a window or turn on the purifier. This is where a monitor pays for itself.
- Act on what you see. High CO2 means more fresh air. Spiky PM2.5 means a range hood, a purifier or less candle use. High humidity means a dehumidifier.
If the basement is your problem area, read our basement air quality guide next.
When to Call a Professional
A pro makes sense when you can see or smell mold, when a radon test comes back above 4 pCi/L and you want a mitigation quote, or when you are buying or selling a home and need a report. Radon fixes are done by a qualified radon mitigation contractor. Hidden moisture and mold need an inspector who can trace the water, not just count spores.
The risk to watch is worry without a plan. A number on a screen can scare you or calm you for the wrong reason, and a VOC score tells you little on its own. Some apps also send your home data to the cloud, so read the privacy settings before you plug anything in.
FAQ
Do you really need to test your home’s air quality?
If anyone at home has asthma, allergies or a lung condition, yes. If not, a radon test is still worth doing once, and a monitor is a nice extra. Both give you facts instead of guesses.
What’s the difference between DIY kits and professional testing?
DIY kits and monitors are cheap and good for a first look. A professional brings tools and training to find the source of a problem, not just the symptom. For radon, a DIY test is the standard first step. For mold, a pro can find the hidden water that a kit cannot.
Which air pollutants are most dangerous to monitor?
Radon, PM2.5, CO (with an alarm) and mold from damp spaces top the list. After those, watch CO2 as a ventilation clue, and VOCs after new paint, flooring or furniture.
How often should you test?
Radon: once, then again every two years or after major changes like a new foundation crack or a remodel. A monitor runs all the time. Mold kits are only for a one-off question.
Can opening windows replace air quality testing?
No. Windows help, but they depend on the weather and the outdoor air. A CO2 reading shows whether your usual habits are enough.
What’s a “normal” indoor air quality level?
There is no single normal. As a guide: PM2.5 below 35 micrograms per cubic meter over a day, CO2 under about 1,000 ppm, humidity between 30 and 50 percent and radon as low as you can get it, ideally below 2 pCi/L. Your own baseline matters more than any table.
Bottom Line
Start with radon, add a monitor for the numbers you can change, and call for help only when something looks wrong. That plan costs less than a year of guessing. Once you know your numbers, a purifier, a dehumidifier or a window will have a job to do. For picks, see the best air purifiers for home.
What happens next: expect more states and lenders to ask for radon results at a home sale, and more schools and offices to post CO2 numbers. Use a monitor as a smoke detector for ventilation, not as a lab. When a reading looks high, repeat it, then act.
Related Guides
Keep going with best indoor air quality monitors, Pro-Lab radon kit review, basement air quality guide and best air purifiers for home.